Breakfast Bars

Don’t let the name fool you, although this recipe is called ‘Breakfast Bars’ (from the lovely Donna Hay), I dare you to try to resist these throughout the day!  Instead of making the muesli slab into bars, I cut it into small slices, which are perfect for morning tea.

I couldn’t resist adding to the original recipe, I used it more as a base to start from and then added various ingredients we had in the pantry.  I added the honey as due to the extra ingredients I had added, I felt it needed a bit more help to bind together.

I LOVE these, even Scott and Liam were also impressed.  Liam even swiped a piece whilst I was taking photos of the slice and I found him sitting back on the couch quite happy with himself.  After cutting the slice, there was a bit of leftovers on the baking paper – these were awesome mixed with vanilla yoghurt and strawberries!  I’m now thinking of even making this combination up as a muesli mix.

Enjoying afternoon tea

Enjoying afternoon tea

3/4 cup rolled oats

1/4 cup flaked almonds (I used blanched almonds)

1/4 cup sunflower seeds

1/4 cup quinoa flakes

2 tablespoons wheat germ

2/3 cup plain whole-wheat flour

1/2 teaspoon baking powder

2/3 cup brown sugar

1 teaspoon ground cinnamon

1/2 cup canola or vegetable oil

1 egg

1 teaspoon vanilla extract

1 cup dried cranberries

I also added:

Replaced 1 cup of dried cranberries with 1/4 cup goji berries and 3/4 cup dried cranberries

2 tablespoons coconut

2 tablespoons LSA mix

2 tablespoons chia seeds

1/4 cup pepitas

1/4 cup honey/or honey substitute if you would prefer

* Preheat oven to 160 degrees

* Place oats, almonds, sunflower seeds, quinoa (and pepitas if using) on a tray lined with baking paper and bake for around 10 minutes until golden

* Place the wheat germ, flour, baking powder, brown sugar and cinnamon in a bowl and stir to combine (add coconut, LSA mix and chia seeds also if using)

* Add the oil, egg, honey (if using) and vanilla and stir until smooth

* Add the oat mixture and the cranberry/goji berry mixture and stir to combine

* Spoon mixture into a slice tin lined with baking paper and push down using the back of a spoon. Bake in over for 25 – 30 minutes until golden brown.

* Cool in tin for 10 minutes before turning onto a rack to cool further, then cut into bars/slices and enjoy!

breakfast muesli bar


Linking up with the Multitasking Mummy for Mummy Mondays

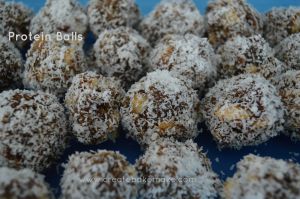
Protein Balls

Contrary to popular belief, not everything I make is unhealthy.  These protein balls are super quick to make, use up whatever you have in your pantry, and are a great snack to satisfy your sweet tooth – Scott even mistakes these for rum balls!

I came across the idea, whilst Aiden was in NICU and one of his nurses bought some in for me to try.  I normally don’t measure any of the ingredients I put in, however below is what went into my latest batch. I tried a friends version this week, she adds acai berries and cocoa powder which gave them a great flavour.

protein balls copy

300g pitted dates

1/4 cup LSA mix

2 tablespoons hazlenut meal

1/4 cup coconut + extra for rolling

2 tablespoons  black chia seeds

100g walnuts

50g blanched almonds – toasted

50g brazil nuts

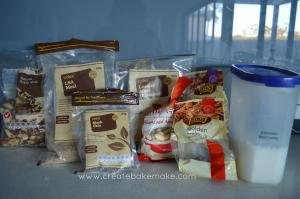
What's rattling around in my pantry this week

What’s rattling around in my pantry this week

* Soak dates in boiling water for 20minutes until soft , then drain excess water

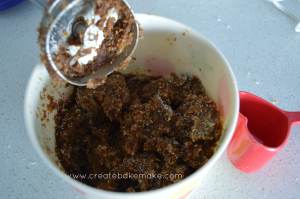
* In a bowl, combine dates, LSA mix, hazlenut meal and coconut. Using a stick blender, blitz until dates reach desired consistency (I like the dates to still have some shape to them, it’s up to you though!)

* Add chia seeds, walnuts, almonds and brazil nuts and blitz until nuts are in smaller pieces – don’t worry, even though it doesn’t look very appealing, they do taste great!

date balls 1 copy

* Roll tablespoon sized balls in coconut and then pop into the fridge to set.

It’s a scone off!

I love scones.  They are the perfect morning/afternoon tea, and super easy to put together. For the last few years I’ve used a traditional recipe (source unknown) and apart from the couple of times when I used plain flour instead of self raising (I blame baby brain) they have never failed. In the past I’ve also tried Lemonade Scones (made using a can of lemonade and cream), but there is nothing like the traditional recipe in my opinion.

After devouring Nigella Lawson’s ‘How to be a Domestic Goddess’ – something I wish I was, but constantly fall short on – I was keen to try her recipe ‘Lily’s Scones’ which rather than using self raising flour, use plain flour combined with bicarb soda and cream of tartar.  What better way to compare the two than to have a scone off!

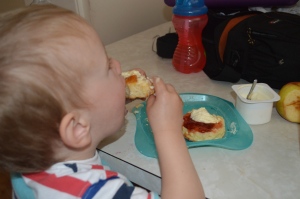
My little helper as well as my family have enjoyed this challenge.  We’ve had a few debates over which scone is better, I think they have been watching too many cooking shows with comments about the ‘crumb’, ‘texture’ and ‘overall appeal’ being tossed about.

Always eager to help out!

Always eager to taste test!

We found Nigella’s scones to be VERY light and fluffy – thanks to the cream of tartar, although they rose, I felt they could have been higher. The egg wash gave them a good colour and they tasted great.

Nigella's scones

We didn’t find a huge difference in taste, it was really the different textures that set the two apart.  Personally I prefer the original recipe, they rise well and have a great texture and taste.

Original and still the best?

Original and still the best?

Both of the recipes are below – you be the judge!

‘Lily’s Scones’ – How to be a Domestic Goddess by Nigella Lawson

500g plain flour

1 teaspoon salt

2 teaspoon bicarbonate of soda

4 1/2 teaspoons cream of tartar

50g cold unsalted butter diced

25g trex, in teaspoon lumps (or use another 25g butter)

300ml milk

1 large egg beaten for egg wash

  • Preheat oven to 220 degrees
  • Sift the flour, bicarb and cream of tartar into a large bowl
  • Rub in the fats until it looks like breadcrumbs
  • Add the milk all at once and mix briefly with a knife
  • Turn onto a floured surface and knead lightly to form a dough
  • Roll out to about 3cm thickness
  • Dip cutter into some flour (6 1/2 cm round cutter) and cut out scones.
  • Bring excess dough back together to cut out more scones (I made 11)
  • Place on a lightly greased baking tray quite close together and brush with egg wash
  • Place in oven and cook for 10 minutes or until risen and golden

vs

Traditional Scone Recipe – origin unknown

3 cups self raising flour

pinch of sale

1/4 cup cold unsalted butter diced

2 1/4 cups milk

extra milk for wash

  • Preheat oven to 230 degrees
  • Sift flour and salt into large bowl
  • Add butter and rub in until mixture resembles breadcrumbs
  • Add approx 2 cups of milk and mix together with a butter knife.  Add additional milk as needed (I find I sometimes don’t need to full 2 1/4 cups of milk)
  • Turn onto a floured surface and knead lightly to form a dough
  • Roll out to around 3cm thickness (I don’t use a rolling pin, instead using my hands to pat out/shape)
  • Dip cutter into flour and cut out scones
  • Bring excess dough back together and cut out more scones (I usually make 10 -12 scones)
  • Place on lightly greased baking tray close together so they are almost touching and brush excess milk over for glaze
  • Place in oven and bake for 12 minutes or until risen and golden

Caramel Chip Cookies

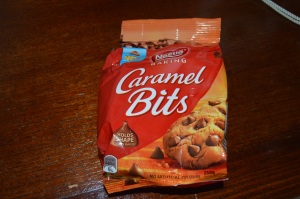
While I was at the local Woolies the other day (replacing the ingredients I have been using from Mum’s cupboard!), I came across ‘Caramel Bits’ by Nestle.  I have seen them a couple of times before, but usually when I’m doing the grocery shopping I don’t have the luxury of spending time looking different products.

Impulse buy

Impulse buy

On an impulse I grabbed a bag, thinking I could substitute them for chocolate chips in another recipe – admittedly I was thinking of adding them to brownies since they are my latest obsession.  Normally I don’t pay attention to the recipes on the back of bags/containers etc, for some reason I am a snob and think they will be rubbish – this time I thought I would give it a go.

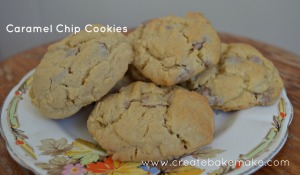
It’s a very straightforward recipe and method, trying a couple of the caramel chips on their own, I found them to be very sweet and was concerned how the cookies were going to turn out.  In the end the cookies were pretty good. Quite plain, and if I was to make them again I would add some nuts to them – maybe pecans or walnuts? Even coconut would be a good addition.  The family thought they were good, and as always my little helper Liam tried one and liked it.

Overall, I was happy with them and will try not to be such a recipe snob in the future!

125g butter softened

3/4 cup brown sugar

1 egg

1 3/4 cups self raising flour – sifted

250g caramel bits

  • Preheat oven to 170 degrees and grease and line 2 baking trays with baking paper
  • Place butter, brown sugar, and egg in bowl of an electric mixer, beat until mixture is pale and creamy
  • Stir in flour, add caramel bits and mix until well combined
  • Roll level tablespoons of mixture into balls, place on prepared trays about 4cm apart and flatten slightly.
  • Bake in oven for 15 minutes or until golden.
  • Set aside on trays for 5 minutes to cool and then transfer onto wire rack to cool completely

caramel chip cookies

Chocolate Goodness – Choc Chip Butter Cake

Continuing my journey through Donna Hay’s Simply Essentials Chocolate book, I decided to make this butter cake – with choc chips of course!  After I had made a different version of butter cake over the weekend, I was keen to try another recipe.

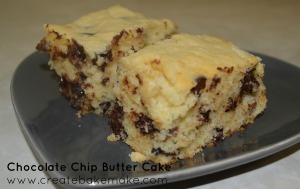
This cake is incredibly moist and has a great vanilla/buttery flavour.  I didn’t have any sour cream, and substituted with natural yoghurt which worked well.  I also used a whole bag of cadbury dark chocolate chips instead of chopped dark chocolate.  I love dark chocolate and thought it complemented the cake brilliantly, but others said they would have preferred milk chocolate.  After having a big weekend, I’m back on the straight and narrow and have eaten well today. However the temptation of warm cake was too much and I gave in and ate a whole piece…  it was worth it though!  I will now be setting the alarm early to go for a walk in the morning!


185g butter softened

1 1/4 cups caster sugar

1 teaspoon vanilla extract

4 eggs

3/4 cup sour cream

2 1/3 cups plain flour

1 1/4 teaspoons baking powder

3/4 cup chopped dark chocolate


  • Preheat oven to 160 degrees
  • Place butter, sugar and vanilla in bowl of mixer and beat for 8-10 minutes or until light and creamy
  • Add the eggs and sour cream and beat well
  • Fold through the flour, baking powder and chocolate
  • Spoon the mixture into a 20 x 30cm slab tine lined with non stick baking paper
  • Bake for 40 minutes or until cooked when tested with a skewer
Yum!

Yum!

Inspiration for the weekend – Orange and Blueberry Cake

A few months back I turned 30 – I’m still coming to terms with it! I thought it was about time I ramped up my anti ageing efforts so a couple of weeks ago I went out and bought some super dooper (and expensive) eye cream.  Fast forward to three days later and my cheeks/under my eyes were red, dry and puffy,  so last weekend I was back at Myer to return it.  It was perfect timing as Myer had a one day sale with 40% all full priced books, so I took the opportunity to buy ‘Baking’ by Australian cooking royalty – Margaret Fulton, and also ‘How to be a Domestic Goddess’ by Nigella Lawson.

Margaret Fulton - Australian Baking Royalty

Margaret Fulton – Australian Baking Royalty

I’m slowly reading through ‘Baking’ and there are so many recipes that I want to try.  It has all the old favourites (tea cake, self saucing chocolate pudding etc) as well as recipes from around the world such as Bienenstich (honey flavoured bee sting cake from Germany) and Danish Raspberry Shortcake.

I thought I’d try  the orange and blueberry cake, as Mum had all the ingredients.  Whilst the cake tasted great, and Mum’s work colleagues were happy to devour the leftovers the next day, I was a little dissapointed that the blueberries all sank to the bottom, and I had to add another 15 minutes to the cooking time , but will put this down to being unfamiliar with Mum’s oven.

2 cups self raising flour sifted

1 1/3 caster sugar

2 eggs lightly beaten

3/4 cup milk

grated rind and juice of 1 orange

130g butter melted

200g fresh or frozen blueberries (I used frozen)

  • Preheat oven to 180 degrees and grease a deep 22cm loose based flan tin or cake tine
  • Combine the flour and sugar in a large bowl
  • Add the eggs, milk, rind, juice and butter and mix until combined
  • Spoon into the prepared tin
  • Top with half of the blueberries and bake for 20 minutes
  • Sprinkle over the remaining blueberries and bake for another 20 minutes
  • Cool in the tin for 10 minutes before turning out onto a wire rack to cool
Orange & Blueberry Cake

Orange & Blueberry Cake

Throwback Thursday – Peanut Butter Scrolls

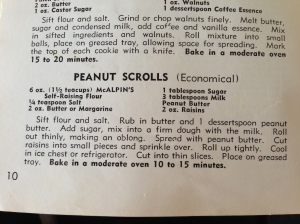
I chose this recipe as I thought it was an odd combination of ingredients and I was curious as to how it would work. My attention was also grabbed by the ‘Economical’ comment next to the recipe heading. They turned out better than expected, and were also a hit with my two biggest critics Scott and Liam.

Please click here for link to metric conversion table

Original Recipe

Original Recipe

Peanut Scrolls

6 oz (1 1/2 teacups) self raising flour

1/4 teaspoon of salt

2 oz butter or margarine

2 tablespoon of sugar

3 tablespoons of milk

Peanut Butter – no amount specified

2 oz raisins

  • Sift flour and salt.
  • Rub in butter and 1 dessertspoon of peanut butter.
  • Add sugar, mix into a firm dough with the milk (I found it easiest to use my hands towards the end)
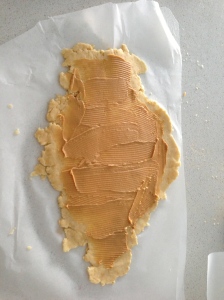
  • Roll out thinly, between two sheets of baking paper into an oblong shape
  • Spread with peanut butter
Peanut Butter - yum

Peanut Butter – yum

  • Cut raisins into small pieces and sprinkle over
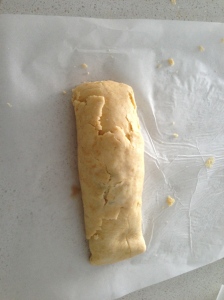
  • Roll up tightly, wrap in glad wrap and put in fridge or freezer until firm
My roll looked a bit dodgy

My roll looked a bit dodgy

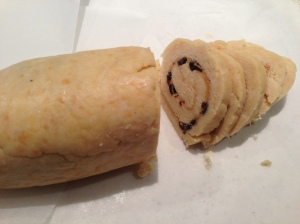
  • Cut into thin slices
The dough should be quite firm to cut through

The dough should be quite firm to cut through

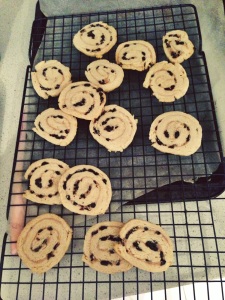
  • Place onto greased tray and bake in a moderate over for 10 – 15 minutes (I baked these for 12 minutes on 160 degrees in a fan forced oven).
Enjoy!

Enjoy!

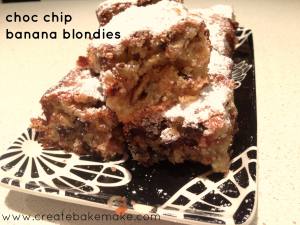
Friday Afternoon Chocolate Goodness – choc chip banana blondies

Yesterday I had a wonderful couple of hours to myself at the hairdresser- well Aiden was with me but he slept the whole time.  Since the past week has been crazier than normal, with broken bones/visitors/cranky toddler and a last minute trip to pack for, I took with me the September issue of Delicious magazine to enjoy in peace.  About a third of the way through I came across this recipe and knew I had all the ingredients to give it a go when I got home.

September 2013 issue of Delicious Magazine

September 2013 issue of Delicious Magazine

It was fairly quick to put together, and I baked mine for around 40 minutes.  They came out of the oven just as I was about to leave for dinner out with the girls, so I was able to skip buying a caramel sundae on the way home and tried a piece of blondie instead.  The verdict is – they are GREAT!  I tried a middle piece that was gorgeously (not sure if that’s a real word, but it’s an accurate description) soft and fudgey.  The combination of white/dark chocolate, banana and walnuts is sensational.  Given I’d had a relatively high calorie dinner, I skipped the extra drizzle of white chocolate and just sprinkled it with icing sugar.


Happy Friday everyone – try these this weekend!


100g unsalted butter chopped

250g white chocolate chopped

250g castor sugar

1 egg lightly beaten

2 bananas, mashed

1 teaspoon vanilla extract

1 1/3 cups plain flour

1/4 teaspoon baking powder

3/4 cup walnuts chopped

1/2 cup dark chocolate chips

Icing sugar to serve


  • Preheat oven to 180 degrees & grease and line the base and sides of a 20cm square cake pan with baking paper
  • Place the butter and 200g white chocolate in a heatproof bowl which is on top of saucepan of gently simmering water (don’t let bowl touch the water) and stir until melted
  • Remove from heat
  • Transfer chocolate mixture to a large bowl and stir in sugar, egg, banana and vanilla
  • Sift over flour and baking powder, stir to combine, the fold in the nuts and dark chocolate chips
  • Pour batter into the pan and bake for 35 minutes or until golden, cool completely in pan
  • Melt remaining 50g of white chocolate, cut blondies into squares, dust with icing sugar and drizzle with melted chocolate to serve

choc chip banana blondies1

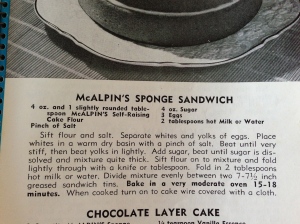
Throwback Thursday – McAlpin’s Sponge Sandwich

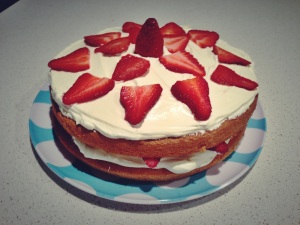
Even though I love to bake, I don’t seem to make a lot of sponges.  We had a heap of strawberries in the fridge and some cream, so I thought I’d give the McAlpins Sponge Sandwich a try.  The tins I used were a bigger than those suggested, so my sponges were a bit thin. I was happy with how they turned out. The colour was good and they had both risen evenly.  I cooked them on the same rack in the oven, which I’m not sure if you are supposed to do?To compensate for their height, I just put a thick layer of cream and strawberries in the middle which improved the overall appearance of the cake.

I didn’t get to try a piece, Scott took it to work the next day.  He said it went down well, but suggested adding a layer of strawberry jam to the cream and strawberry layer.. He is my biggest critic & always seems to have a suggestion on how I can improve!

Original Recipe

Original Recipe

Please click here for metric conversation table

McAlpins Sponge Sandwich

4 oz and 1 slightly rounded tablespoon of self raising flour

Pinch of salt

4 oz sugar

3 eggs

2 tablespoons of hot milk or water (I used hot milk)

600ml of thickened cream

1 1/2 teaspoons of vanilla essence

2 tablespoons of icing sugar

250g strawberries

  • Sift flour and salt
  • Separate whites and yolks of eggs
  • Place whites in a warm dry basin with a pinch of salt and beat until very stiff, then beat yolks in lightly (low mixer speed)
  • Add sugar and beat until sugar is dissolved and mixture is quite thick
  • Sift flour onto mixture and fold lightly through with a knife or a tablespoon
  • Fold in 2 tablespoons of hot milk or water
  • Divide mixture evenly between two 7 – 71/2 inch greased sandwich tins.
  • Bake in a very moderate oven for 15 – 18 minutes (I baked for 15 minutes in a 180 degree fan forced oven).
  • When cooked, turn cake onto a care wire covered with a cloth
  • Whip cream, vanilla essence and icing sugar together
  • Cut strawberries into thin slices
  • Once cake has cooled, spread cream on top of one cake, and cover with half the strawberries
  • Spread remaining cream and strawberries on top of cake – serve
Enjoy!

Enjoy!

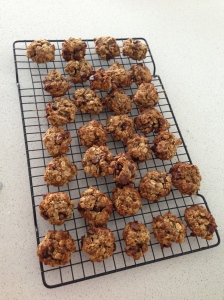
Chocolate Chip, Date & Coconut Lactation Cookies

I had never tried lactation biscuits before having Aiden.  Whilst googling random things during a night feed, I came across ‘low fat’ biscuit recipes on the Lose Baby Weight website.  I have since made a few batches and have added a couple of ingredients and make my cookies smaller (usually getting between 36 – 48 cookies), so I am unsure of the nutritional content.

I snack on these during the afternoon to help boost my milk supply during the early evening when it seems to be at it’s lowest.  A batch usually last up to a week (my husband won’t eat them as he thinks they will make him start lactating!), and I think they have helped my supply – or I may just be telling myself that they are!


1 1/2 Cups of Rolled Oats

3/4 Cup of Flaxseed (Linseed Meal)

3 Tablespoons of Brewers Yeast – I use 4 x 5g sachets of brewers yeast

1/2 Cup of Unsweetened Applesauce

1/3 Cup of Maple Syrup – I substitute for Golden Syrup as it’s cheaper

1/4 Cup of Light Oil

1 small Egg

1 Teaspoon of Vanilla Extract

1/2 Teaspoon of Baking Soda

1/2 Teaspoon of Ground Cinnamon

1/2 Cup of Chocolate Chips – I use Cadbury dark chocolate chips… yummo!

8 -12 Pitted Dates chopped up

1/2 Cup of Coconut

  • Preheat oven to 180 degrees (Fan Forced)
  • Line 2 trays with Baking Paper
  • Combine Apple Sauce, Maple Syrup, Oil, Egg and Vanilla Extract and whisk until smooth.
  • Stir in Oats, Flaxseed, Brewers Yeast, Baking Soda, Coconut and Cinnamon until combined
  • Fold in Chocolate Chips and Dates.

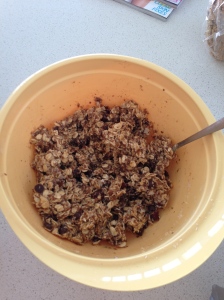
IMG_6969

  • Lightly roll teaspoon sized balls of mixture and place on tray – flatten slightly with a fork
  • Bake for 12 – 14 minutes until starting to turn golden brown

I’d love to hear any other lactation cookie recipes that you may have – preferably ones that work!

Finished Product

Finished Product