Our Big Boy’s Construction Party

After all the planning and preparation it’s all over for another year. Yesterday our big boy, our rainbow baby turned 2 and we held his birthday party.  To me, a birthday party should be all about having fun……. and the food!

Since I am keeping things ‘simple‘ this year, we decided (I say ‘we’ but really mean me!) to keep things small and just invite his little friends that he sees regularly.  In theory this is fine, but when you then add parents and siblings it can turn into a much larger gathering quite quickly!  Regardless, we had a great day with wonderful friends and great food (well at least I’m hoping everyone liked the food!).

Liam Party 3


I may sound surprising, but I like catering for parties/friends and I enjoy sitting down planning menus and working out when everything needs to be done – shocking I know!  This year I was determined I would be organised and keep things simple so I could enjoy the day and not end up stuck in the kitchen.

I attempted to complete the grocery shopping earlier in the week, but when both the boys decided to fill their nappies in the middle of Woolworths (and neither was in a good mood about it), we had to cut our shopping trip short.  I then spent the day before the party, baking Blueberry, Carob and Coconut muffins, Corn, Cheese, Spinach & Tomato muffins, Sausage Rolls and I got started on the birthday cake (I will post these recipes later this week).

Last year I went all out with a two tiered fondant covered jungle cake – however trying to work with icing in the middle of summer is NOT a good idea and I decided to save myself some heartache (as well as $$$ from not running the air conditioner full time to keep the cake cool) and decided to make a good old butter cake.  To jazz things up a little, I made a chocolate swirl butter cake by making one plain butter cake mix and one chocolate butter cake mix (just add 2 tablespoons of cocoa and 2 tablespoons of milk to my recipe) and combined the two together in two separate cake tins.

The hours of my life that I lost to Pintrest paid off. As our big boy is a obsessed fan of trucks, I just had to make him a cake with a truck on it.  To make a construction cake, I cut the two butter cakes in half, and sandwiched then together with chocolate buttercream (just add 3 tablespoons of cocoa and 3 tablespoons of milk to buttercream recipe).

I then (with just a little bit of trepidation) used a knife to cut away a chunk of cake to create the ‘falling rocks’ effect.  I used the remaining buttercream to cover the rest of the cake, and then created the rockfall effect using crushed chocolate ripple biscuits as dirt, and Violet Crumble as the rocks.

Liam Cake


I decorated the base of the cake with yellow smarties, and added a toy truck and some construction signs to the top of the cake.

Liam Cake 2


Our big boy LOVED his cake (especially the truck on top) and was super keen to try some

Liam Cake 1


Again thanks to Pintrest, I got some great ideas for table decorations. I found the two truck I used at K-Mart for $10 each which I thought was pretty reasonable, especially as they already have been given a good workout being driven around our yard.

Liam Party


I also made little cars using tiny teddies, smarties and some melted dark chocolate.  These were a big hit with the kids, and while they were a bit time consuming, I made them the day before and just popped them into the fridge.  I found using a toothpick to apply the chocolate to the teddies and smarties to be the easiest way to go.

Liam Party1


I may have gotten a little too carried away with the catering, we also had sandwiches, cheese and dip platters, pizza slices and fruit salad boxes…. not to mention chicken nibbles and mini sausages that I forgot to put out!!

All the preparation paid off, I was actually able to sit down and watch our big boy playing happily with his friends and the feelings of happiness and just a little pride were overwhelming.  I think he sensed that it was a special day, he was particularly affectionate towards all of us, and was in a great mood all day.  I admit I’m a little sad it’s over, as it means my big boy is growing up, but I also can’t wait to celebrate many more special birthdays with him.

How do you celebrate birthdays?

Linking up today with The Multitasking Mummy for Mummy Mondays

Caramel and Banana Layer Cake

Being the party animals that we are, we decided to ask a couple of friends over to our place for New Years Eve.  Even though we were all still getting over the excess of food and goodies we had been consuming during the past week, I still wanting to make something yummy – and a little naughty for our New Years dessert. I’ve made this cake a few times now and the recipe is from Donna Hay’s Modern Classics 2.  This time I decided to add banana to the layers in the attempt to bring a little bit of goodness to an otherwise sweet and yummy dessert.

It was a lovely night, spent with some great friends.  Alas our toddlers partied more than we did, with the adults happy to sit back and watch them expend what seemed to be a never ending supply of energy…..  If only they could have passed some on to us, we were all in bed by 11pm!

I hope you are all having a great start to the year

xx

caramel and banana layer cake

1 1/4 cups plain flour

6 eggs

3 1/2 tablespoons caster sugar

3 1/2 tablespoons brown sugar

125g butter – melted

2 cups thickened cream

vanilla essence

2 tablespoons icing sugar

1 banana – sliced thinly

caramel sauce – cooled

Caramel Sauce

– 3/4 cup brown sugar

1 cup of single or pouring cream (I’ve also used thickened cream in the past and it has still turned out fine).


– Preheat oven to 180 degrees.  Line and grease a 18cm square tin

– Sift the flour three times and put aside.

– Put the eggs, caster sugar and brown sugar in a bowl and beat together for 8-10 minutes with an electric mixer until mixture is pale and thick and has tripled in size

– Sift flour over the mixture and fold together gently, then fold in the butter.

– Using a spoon, put mixture into tin, and bake for 25 minutes.

– While cake is baking, make caramel sauce by stirring together brown sugar and cream in a small saucepan over medium heat until the sugar has dissolved.  Increase the heat and simmer for around 8 minutes or until the sauce has thickened.  Let the sauce cool slightly in the saucepan, before transferring to another container and place in the fridge for 20 minutes to cool completely

– Cool cake in tin for 5 minutes and then turn onto a cake cooling rack – leave until completely cooled before slicing cake in half

– Beat together cream, drop of vanilla essence and 2 tablespoons of icing sugar until cream is whipped

– Spread half of cake with cream, cover with half of the banana slices, and half of the caramel sauce

– Carefully place top layer onto the cake and repeat.

– I like to leave this cake for an hour or so in the fridge, then remove around 15minutes prior to serving.  It’s best eaten the day of/day after making.

Baptism Cake – Butter Cake with Buttercream Frosting

Setting off on our 1700km road trip down to Victoria, we didn’t make any plans as to where we would stop, or how far we wanted to get each day.  The only deadline we had was that we needed to be in arrive by the Sunday morning (we left on Friday morning), as our boys were being baptised at the local church that morning.

Thankfully the boys were PERFECT (well, close enough anyway!) and we arrived a whole 24 hours before the baptism.  Although it was a small event, of course we needed a cake to celebrate!! In theory this gave me plenty of time to make and decorate one for them.

I decided to go with a simple butter cake, topped with butter cream – the same one I made for my sister’s baby shower.  I bought some very cute animal cake toppers from Coles, and also used smarties to decorate – I did need 2 large bags to get enough of the colours that I wanted!

Baptism Cake1

I only finished decorating the cake 10 minutes before we had to leave for Church as I had no little help from my husband who decided to go riding that morning and lost track of time – but let’s not even get me started on that!

Baptism Cake

The cake was a big success, there was way too much for just seven adults, but Liam was more than keen to try some!

This is such a versatile and easy cake to make.  Even though you need to make two cakes to get the four layers, it still takes no time at all to put together.  After the stress of getting everyone and the cake ready, it was a very fitting way to end what turned out to be a beautiful day xx

baptism 2

Orange and Ginger Cake

Thanks to The Multitasking Mummy, we recently collected our prize ‘The Cookbook’ by Ella’s Kitchen from our local post office (we were home when they so called ‘attempted’ to delivery the parcel.. don’t even get me started!).  The book is filled with lots of recipes for toddlers and kids, and has given me some great ideas to mix things up a bit.

We – well really ‘I’ decided to try the ‘Awesome Orange and Ginger Cake’ since we had all of the ingredients.  It was a good recipe to make with a little helper, Liam had a ball sifting the flours, adding the egg (and shell) and stirring all the ingredients together.  I felt the sugar content was a little high, so I halved the amount of golden syrup, and reduced the amount of marmalade to 175g (next time I would try making it with orange zest and juice).  We also decided to add some shredded coconut on top, a job which Liam really enjoyed. When we were licking the bowl, Liam commented the the mixture was ‘hot’ – I think he was referring to the ginger which isn’t used to.

Liam was a bit impatient waiting for the cake to bake, and spent a lot of time staring through the oven door, whilst telling me the oven was ‘hot’ and ‘ouch’.  When the cake was out of the oven and had cooled, he was very excited to try some of ‘his cake’.  Our version was quite moist, and still quite sweet with a strong orange flavour, despite altering some of the ingredients.  The shredded coconut on top really went well with the flavour, and I’d include it next time we make this.

Given I had a very enthusiastic little helper, the cake turned out quite well.  We cut it up into small toddler sized pieces and popped them in the freezer, they will come in handy for a special treat.  We are looking forward to trying our next recipe!

Orange & Ginger Cake

75g unsalted butter

150g golden syrup (I used 75g)

225g self raising flour

2 teaspoons ground ginger

1 teaspoon ground cinnamon

225g coarse cut orange marmalade (we used 175g)

1 egg beaten

1 tablespoon freshly squeezed orange juice

* Preheat oven to 180 degrees and grease and line a 20cm square cake tin

* Melt the butter and syrup in a saucepan over a low heat, stirring well to combine. Remove the mixture from the heat and set aside

* Sift the flour, ginger and cinnamon into a bowl, slowly pour in the syrup mixture and stir to combine

* Add the marmalade, egg, orange juice and 1 tablespoon of hot water and mix until combined. Add a further 1 – 2 tablespoons of hot water if you feel it’s needed (i.e. mixture is too stiff)

* Pour into the cake tin and spread evenly, bake for 30 – 35 minutes until golden.

* Cool in tin for 15 minutes, before removing and placing onto a wire rack to cool completely

Linking up with The Multitasking Mummy for Mummy Mondays

Yoghurt Cake with Raspberry and Pomegrantate Jam Glaze

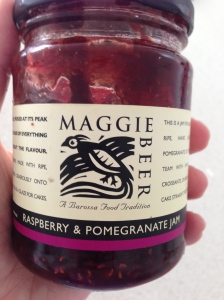
I may have gotten a little carried away at the Maggie Beer stand at the Good Food & Wine show recently.  It was a little hard not to, there were so many yummy products, the staff were lovely and there were heaps of samples to suck you in.

When I visit our local cafe, my standing order is an extra large double shot skinny iced latte (keep that in your memory bank if anyone ever feels like dropping by) and two slices of raisin toast with a beautiful homemade raspberry jam.  So when I spied Maggie’s (I can call her that since I know her so well from watching her on tv) Raspberry and pomegranate jam, it was a no brainer that I was going to buy it.

IMG_8851

As well as saving the $4.50 I normally would spend, and being delicious on my toast at home, it has the added bonus of using as a glaze over cakes – yoghurt cake specifically as that is what Maggie recommends on the side of the jar.

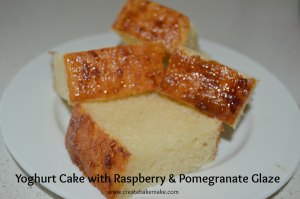
I went searching online for a yoghurt cake recipe and found a reader’s recipe on Nigella Lawson’s site.  The cake was easy to make and as soon as it was out of the oven I eagerly covered it with a layer of Maggie’s jam – not too generously though, as I didn’t want to ‘waste’ my special jam.  After only 10 minutes I was too impatient any longer and cut the cake….  I was a little disappointed, the cake wasn’t the best and I was starting to get annoyed that I’d wasted my jam on it.  Thankfully I went back to the website to read through some of the comments (probably should have done that originally) and noted it said the cake was best eaten cold.

The next day when I returned to it, I could see why eating it cold was recommended.  It tasted much better, and the jam on top turned it into something a lot more special.

Look at that lovely jam!

Look at that lovely jam!

1 cup natural yoghurt

2 cups sugar

3 cups flour

½ cup oil

3 eggs

1 ½ teaspoons baking powder

1 pinch of salt

1 teaspoon vanilla extract

* Preheat oven to 180 degrees, and line the bottom of a round 25cm cake tin with baking paper and grease the sides.

* Mix together all ingredients in a large bowl.

* Pour into cake tin and bake for 30 – 35 minutes until the top is golden brown and it’s cooked through

* While cake is still warm, brush Raspberry and pomegranate jam over the top.

* Allow the cake to completely cool before cutting and serving.

Milk Chocolate Mousse Tart

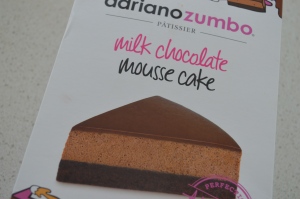
I have again gone over to the dark side…. I bought another packet mix this week!  In my defence, after the delicious success that was Adriano Zumbo’s Salted Caramel Macarons, when I saw this Milk Chocolate Mousse Cake, I knew I had to try it out.

Another packet mix!

Another packet mix!

I’m calling my version a tart, I didn’t have a small enough cake tin, so mine is a bit bigger and thinner. Regardless of this, it turned out well and tasted divine.  Even the mixture tasted great, with Liam and I licking the bowl clean, and him asking for ‘more’ when it was all gone.

Yum!

Yum!

As I’ve mentioned before, when I’ve made Adriano’s mixes, I still feel as though there is a little cooking and skill involved, rather than just pouring the pack straight into a bowl and adding water.

This was $7.95 well spent, the only problem is it’s calling out to me from the fridge just begging to be eaten!

milk chocolate mousse tart

Pear, Goji Berry and Almond Loaf

After making a couple of purchases from the Maggie Beer stand at the Good Food and Wine show over the weekend, I was super keen to use the dried Duchess Pears that I had bought.

I was initially thinking of making a muesli slice, and just adding the pear to it. After opening the pack and smelling their delicious sweet scent, I knew I needed to make them the star of the dish (OMG I sound like a Masterchef judge with that comment!).

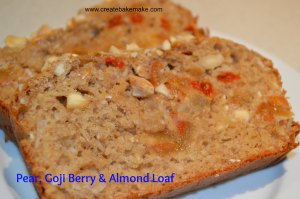
Searching on the Lifestyle Food website, I came across a Bill Granger recipe for Apple, Dried Cherry and Almond Loaf (from his ‘Every Day’ book) that I thought I could adapt.  Whilst I was confident the Pears alone would give enough flavour to the loaf, I wanted to add a little something extra. It was a decision between Goji Berries and Cranberries and I’m very happy with the decision I made!

This is soooo good...

This is soooo good…

50g rolled oats

300ml milk

240g self raising flour

1 teaspoon baking powder

180g dried pears (original recipe is 125g dried cherries and 50g diced dried apple)

75g brown sugar

1 teaspoon cinnamon

3 tablespoons honey

1 lightly beaten egg

3 tablespoons of roughly chopped almonds & additional 1 tablespoons of extra chopped almonds

* Place oats in a bowl with milk and soak for 30 minutes

* Preheat oven to 180 degrees and grease and line a loaf tin

* Sift flour and baking powder into a bowl, stir in rolled oats mixture, dried fruit, sugar, cinnamon, honey, egg and almonds

* Spoon into tin, level the top and sprinkle extra almonds over the mixture.

* Bake for 45 minutes or until golden and cooked through. Allow to cool in the tin for 5 minutes before transferring to wire rack.

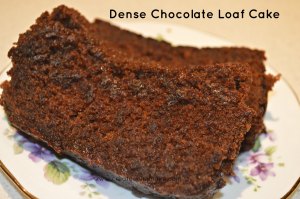
Dense Chocolate Loaf Cake

It feels like it has been awhile since I have made something truly decadent.  When searching for a recipe to rectify this, there is no better book to turn to than ‘How to be a domestic goddess’ by Nigella Lawson.  This is now the second recipe I have made from this book, where she suggests leaving the cake for a day or so for the flavours to develop (see lemon and almond cake), and while this is VERY frustrating for me – I like the instant gratification baking brings, it it truly worth waiting!  This cake is extremely moist, and although I used a mixture of milk and dark chocolate to make up the 100g required, it was still very rich.
I highly recommend putting the cake tin on another tray, as even though I used the cake tin suggested, it still leaked over the sides…. and yes, I will admit to eating the overflowed cake pieces!

Chocolatey Goodness x

Chocolatey Goodness x

225g soft unsalted butter

375g dark brown sugar

2 large eggs, beaten

1 tsp vanilla extract

100g dark chocolate – melted

200g plain flour

1 tsp bicarbonate of soda

250ml boiling water

* Preheat oven to 190 degrees and fully line a 23 x 13 x7cm loaf tin.

* Cream the butter and sugar, then gradually add the eggs and vanilla, beating together well

* Fold in the melted chocolate, being careful not to over beat

* Gradually add the flour, alternating with the boiling water which you need to add the bicarb soda to – the batter will be quite runny

* Pour into the lined tin – it’s also a good idea to place tin on a baking tray lined with foil/baking paper as there will be drips!

* Bake for 30 minutes, then turn down oven to 170 degrees and continue to bake for a further 15 minutes.  When you test the cake it will still be quite moist, so a skewer won’t come out completely clean

* Leave cake in the tin to completely cool before turning out.  It can even be left for a day or so as the flavour will improve.  Also don’t worry – the middle of the cake will sink, as it’s so moist, this just adds to it’s charm!

Throwback Thursday – Wholemeal Mocha Cake

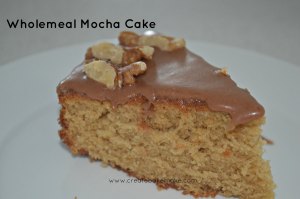
I’m still enjoying making the old recipes from my Nan’s McAlpins cookbook.  The recipes are pretty basic, and they stick to tried and true flavours and techniques.  When I saw this recipe, I thought it was a winner before I had even tasted it!  It goes without saying that a coffee and a piece of cake go together – so why not combine the two?  The addition of chocolate icing literally tops off the flavour of the cake, and I love the walnuts too.  Before I started making the recipes from this book, I’d never used coffee essence before in my baking.  Whilst it did give this cake a good flavour, next time I think I will substitute the essence for an espresso shot…  or maybe two!

chocolate + coffee = winning combination

chocolate + coffee = winning combination


6oz Wholemeal self raising flour

pinch of salt

3oz butter

4oz caster sugar

2 eggs

4 tablespoons milk

1 dessert spoon coffee essence

walnuts to decorate

* Sift flour & salt

* Cream butter and sugar, beat in eggs gradually

* Mix in sifted ingredients alternatively with milk and coffee essence

* Pour into a greased and lined 20cm tin and bake in a moderate oven (180 degrees)  for 20 – 25 minutes.

* When cake has cooled, top with a simple chocolate icing and decorate with walnuts if you wish.

Throwback Thursday – Orange and Sultana Cake

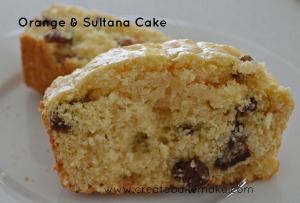
This week’s trip down memory lane is a SUPER quick and easy orange and sultana cake.  After a week of Liam deciding he doesn’t want to sleep in his big boy bed (in reality it’s still his cot, just with one side rail removed) and the subsequent crankiness and tantrums, I was after a recipe that wouldn’t take up too much time.

I find that most of the McAlpins cakes require creaming. This one is different, all the ingredients are just popped in together, mix, and you are all done.  It certainly isn’t the best cake I’ve ever made. But for little time and ingredients it needs, it will do the job for a quick arvo tea.


1 heaped cup self raising flour

1 cup castor sugar

Juice & rind of 1 orange made up to 1/2 a cup by adding milk

1 tablespoon melted butter

1 egg

1/2 cup sultanas


* Place all ingredients together in a bowl and mix for 3 minutes

* Pour into greased cake tin (I used a loaf tin) and bake in a moderate oven for 25 minutes

That is seriously all there is to it!!

Super simple

Super simple