Baptism Cake – Butter Cake with Buttercream Frosting

Setting off on our 1700km road trip down to Victoria, we didn’t make any plans as to where we would stop, or how far we wanted to get each day.  The only deadline we had was that we needed to be in arrive by the Sunday morning (we left on Friday morning), as our boys were being baptised at the local church that morning.

Thankfully the boys were PERFECT (well, close enough anyway!) and we arrived a whole 24 hours before the baptism.  Although it was a small event, of course we needed a cake to celebrate!! In theory this gave me plenty of time to make and decorate one for them.

I decided to go with a simple butter cake, topped with butter cream – the same one I made for my sister’s baby shower.  I bought some very cute animal cake toppers from Coles, and also used smarties to decorate – I did need 2 large bags to get enough of the colours that I wanted!

Baptism Cake1

I only finished decorating the cake 10 minutes before we had to leave for Church as I had no little help from my husband who decided to go riding that morning and lost track of time – but let’s not even get me started on that!

Baptism Cake

The cake was a big success, there was way too much for just seven adults, but Liam was more than keen to try some!

This is such a versatile and easy cake to make.  Even though you need to make two cakes to get the four layers, it still takes no time at all to put together.  After the stress of getting everyone and the cake ready, it was a very fitting way to end what turned out to be a beautiful day xx

baptism 2

Carrot, Banana and Coconut Muffins

These muffins are jam packed full of yummy fruit, veggies and seeds and are also quite filling – the perfect snack to stop any over indulging at your next Christmas party!  This recipe is from ‘Wholefoods for Children’ by Jude Belreau. I am LOVING this book, it is full of great recipes not only for babies and kids, but the big kids too!  This recipe made around 24 muffins, so I stashed half of them in the freezer, and they have defrosted really well.

Please don’t be put off by the list of ingredients, these were really quick and easy to make (with a little helper), and you can always substitute regular flour for spelt flour and cow’s milk for coconut milk if you don’t have any. The original recipe also suggested sultanas, but I prefer currants.

Carrot Banana & Coconut Muffins

130g white spelt flour

165g wholemeal spelt flour

90g rapadura sugar

2 1/2 teaspoons baking powder

1/2 teaspoon ground cinnamon

45g desiccated coconut

1 teaspoon quinoa flakes

1/2 cup pecans or walnuts roughly chopped

1/4 cup sunflower seeds roughly ground

1/4 cup pepitas roughly ground

1 banana cut into small pieces

1/2 cup rasins

90g unsalted butter melted and cooled

1 egg

1/2 cup coconut milk

1/2 cup plain yoghurt

1 teaspoon vanilla extract

* Preheat oven to 180 degrees and line muffin tins with cupcake papers

* Place the flours, sugar, baking powered, cinnamon, coconut, quinoa flakes, nuts and seeds into a bowl and whisk together to combine.

* Add the carrot, banana and currants and mix through

* Place the butter, egg, coconut milk, yoghurt and vanilla in a bowl and mix until it has just combined

* Add to the dry ingredients and mix through until just combined. Let the mixture stand for a couple of minutes to absorb some of the liquid, then spoon into muffin pan.

* Bake for approx 20 – 25 minutes until golden on top and cooked through.

Christmas Baking – Shortbread

Is there anything better than shortbread at Christmas time?  This is the only time of the year I ever make this (all bar last year when I made interesting shaped shortbreads for my sister’s hens night), and i just LOVE the stuff.

This recipe is from my Mum, going waaaay back to when we were kids and she was stuck with us in a Doctor’s waiting room watching crappy morning tv shows (this was the early 90s – some things haven’t changed though), and she saw this on a cooking show called ‘What’s Cooking’. She was so impressed with it, that she wrote down the number at the end of the show, and called up to get the recipe posted to her – that is a hard copy typed out and sent through the post – yes kids, this really used to happen!  Since then it’s been her trusted recipe, which over the past few years since I’ve been making it I’ve called my own.

My biggest tip is that you need to make this in a cool room – living in Brisbane this can be hard during the Summer, so I always try to make it first thing in the morning.

Shortbread

250g softened butter

125g caster sugar

25g rice flour

5 drops of vanilla essence

375g plain flour

* Preheat oven to 190 degrees.

* Beat together the butter, sugar and rice flour until they turn white. Add a few drops of vanilla essence and continue to beat.

* Gradually add the flour to the mixture, whilst continuing to mix on a low speed until a paste forms.

* Turn mixture onto a cool bench dusted with flour and work until a smooth ball forms.

* I split my ball into two and place one in the fridge, covered in glad wrap.

* Roll the other ball until apron 1cm thick and use cookie cutter to make desired shapes.

* Bake in oven for approx 12 minutes until edges start to turn a golden brown.

Orange and Ginger Cake

Thanks to The Multitasking Mummy, we recently collected our prize ‘The Cookbook’ by Ella’s Kitchen from our local post office (we were home when they so called ‘attempted’ to delivery the parcel.. don’t even get me started!).  The book is filled with lots of recipes for toddlers and kids, and has given me some great ideas to mix things up a bit.

We – well really ‘I’ decided to try the ‘Awesome Orange and Ginger Cake’ since we had all of the ingredients.  It was a good recipe to make with a little helper, Liam had a ball sifting the flours, adding the egg (and shell) and stirring all the ingredients together.  I felt the sugar content was a little high, so I halved the amount of golden syrup, and reduced the amount of marmalade to 175g (next time I would try making it with orange zest and juice).  We also decided to add some shredded coconut on top, a job which Liam really enjoyed. When we were licking the bowl, Liam commented the the mixture was ‘hot’ – I think he was referring to the ginger which isn’t used to.

Liam was a bit impatient waiting for the cake to bake, and spent a lot of time staring through the oven door, whilst telling me the oven was ‘hot’ and ‘ouch’.  When the cake was out of the oven and had cooled, he was very excited to try some of ‘his cake’.  Our version was quite moist, and still quite sweet with a strong orange flavour, despite altering some of the ingredients.  The shredded coconut on top really went well with the flavour, and I’d include it next time we make this.

Given I had a very enthusiastic little helper, the cake turned out quite well.  We cut it up into small toddler sized pieces and popped them in the freezer, they will come in handy for a special treat.  We are looking forward to trying our next recipe!

Orange & Ginger Cake

75g unsalted butter

150g golden syrup (I used 75g)

225g self raising flour

2 teaspoons ground ginger

1 teaspoon ground cinnamon

225g coarse cut orange marmalade (we used 175g)

1 egg beaten

1 tablespoon freshly squeezed orange juice

* Preheat oven to 180 degrees and grease and line a 20cm square cake tin

* Melt the butter and syrup in a saucepan over a low heat, stirring well to combine. Remove the mixture from the heat and set aside

* Sift the flour, ginger and cinnamon into a bowl, slowly pour in the syrup mixture and stir to combine

* Add the marmalade, egg, orange juice and 1 tablespoon of hot water and mix until combined. Add a further 1 – 2 tablespoons of hot water if you feel it’s needed (i.e. mixture is too stiff)

* Pour into the cake tin and spread evenly, bake for 30 – 35 minutes until golden.

* Cool in tin for 15 minutes, before removing and placing onto a wire rack to cool completely

Linking up with The Multitasking Mummy for Mummy Mondays

White Chocolate, Macadamia and Coconut Cookies

Last year, Nestle bought out a book ‘Australia’s Sweet Baking Favourites’ as part of a promotion when you bought a few of their products.  Being the recipe book collection/addict that I am, naturally I got it.  There are some great traditional favourites in this book, but I was eager to add my own spin to a recipe. I settled on the White Choc Chip and Macadamia Cookie recipe since I had a few organic (read expensive) macadamias left over from a slice I’d made a few days before.  Naturally, it only seemed right to add coconut to this mixture to make these taste even better.

We LOVED these, and it just adds further proof (not that I needed any) that coconut makes everything taste better.  Enjoy!

white choc chip macadamia and coconut cookies

125g softened butter

3/4 cup brown sugar

1 egg

1 3/4 cup sifted self raising flour

1 cup white chocolate bits

3/4 cup coarsely chopped unroasted macadamias

1/4 cup shredded coconut

* Preheat oven to 170 degrees and line two baking trays with paper

* Beat together the butter and sugar until pale and creamy, then add the egg and beat until just combined.

* Stir through the flour, white chocolate bits, macadamias and coconut until combined

* Roll tablespoons of mixture into balls and place on trays – leave approx 3cm gap between cookies, and press down on them gently to lightly flatten

* Bake for approximately 15 minutes until golden. Leave to cool on trays for 5 minutes before transferring to a wire rack

Chocolate Wheaten Cookies

During my pregnancies, there have only three things that I have really craved, McDonald’s chicken nuggets (with sweet and sour sauce of course!), Berri fruit ice blocks and chocolate coated wheat biscuits.  Luckily I have only recently come across this recipe, I think if I’d known about whilst pregnant, I would have ended up the size of a bus!

These cookies taste great.  In an effort to be good, I only added chocolate bits to half of the cookies, and still really enjoyed them.  To be a ‘true’ chocolate wheaten biscuit, you could dip the back of the cookies in melted chocolate – as suggested in the book. I decided against doing this, as it would have made them even harder to resist.

This recipe comes from an Australian Women’s Weekly book – Cupcakes, Cheescakes and Cookies.  It’s filled to the brim with lots of yummy treats, and has given me lots of ideas…. if only there was enough time to make them all!

Chocolate Wheaten Cookies

90g butter softened

1/2 cup firmly packed brown sugar

1 egg

1/4 cup desiccated coconut

1/4 cup wheat germ

3/4 cup wholemeal plain flour

1/3 cup white self raising flour

1/4 cup dark chocolate bits

* Beat butter & sugar together until smooth, add egg and beat until well combined. Stir in coconut, wheat germ and sifted flours

* Roll sought between 2 sheets of baking paper until it’s around half a cm thick.  Place in fridge for approx 30 minutes

* Preheat oven to 180 degrees and cover two trays with baking paper

* Using a round cutter, cut into dough and place on baking trays approx 3cm apart.  Bring off cut dough together, cover again with baking paper and roll out to make more cookies.

* Lightly press chocolate bits into the top of cookies & bake for 12 minutes.

* Allow cookies to cool on trays for 5 minutes before transferring to a wire rack

Throwback Thursday – Rock Cakes

Earlier this week, Liam had one of his little friends come over for a play.  I’d had the best intentions of tidying up the night before, but it just didn’t happen.  That morning I was madly racing around trying to make the house at least semi presentable, Liam on the other hand seemed to be following me around unpacking everything I had just put away.

I’d wanted to do some baking for the kids morning tea, but when it was apparent I was quickly running out of time, I thought about making some scones, but changed my mind at the last minute and made Rock Cakes.  This recipe is from my old McAlpins baking book, so I knew it was going to be easy to put together.  When adding the dried fruit I decided to go with currants and chopped dates which were super yummy.

These tasted great straight out of the oven.  If you wanted to, you could cut them in half and add butter or jam, but we were happy to eat them on their own.  The kids enjoyed them, as did Saxon (our dog), who always does well when the kids are outside eating!

Simple & Delicious

Simple & Delicious

2 cups self raising flour

90g unsalted butter, chilled & cubed

1/2 cup caster sugar

1/2 cup mixed dried fruit (I used currants and dates)

1/2 teaspoon ground ginger

1 egg

1/4 cup milk

* Preheat oven to 200 degrees and line 2 baking trays with greaseproof paper

* Sift the flour into a large bowl and rub in the butter with your fingertips until the mixture resembles breadcrumbs.

* Stir through the sugar, dried fruit and ginger.

* Whisk together the egg and milk in a bowl and add to the dry ingredients, mixing until a dough forms.

* Drop rough heaps of mixture (I used a soup spoon) onto the trays and bake for 10 – 12 minutes (I found mine were ready after 10 minutes).

* Transfer onto a wire rack to cool

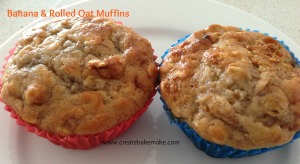
Banana and Rolled Oat Muffins

I know there has been an influx of banana recipes lately – but hey when they are just $1.29 a kilo, who isn’t going to buy in bulk?  We again had some bananas which needed to be used up, and I was after a simple recipe Liam could help me with.  Muffins are always great to make with a little helper, there are lots of jobs for them from mixing the ingredients together, to putting the paper cases into the tin – the problem can then be getting them to leave the paper cases in the tin!

For this recipe I turned to taste.com.au.  It’s always such a trap visiting this site, whilst I go there with the best intention of searching for just one recipe, it’s just so easy to get sidetracked and end up with a whole list of things that I want to make (just now after visiting the site for the recipe link, I want to make today’s featured recipe – raspberry, chocolate & almond cake!).

A yummy snack

A yummy snack

It took all of 15 minutes to make these – admittedly it would be a lot quicker without a little helper, but where is the fun in that!  They tasted great, I liked the rolled oats mixed in, next time I think I’d add some chopped walnuts or pecans to give a little extra flavour.  Liam liked them (surprise surprise!) so I’ve stashed a few in the freezer for him.  Alas the next morning when I tried to bribe him with one of these muffins if he would let me cut his hair, he wouldn’t come to the party….

Liam's favourite job!

Liam’s favourite job!

2 cups self raising flour

1 teaspoon ground cinnamon

1/2 teaspoon bicarbonate of soda

1 cup rolled oats

1/2 cup brown sugar

2 eggs

3/4 cup plain low fat yoghurt

1/4 cup canola oil

2 bananas mashed

* Preheat oven to 200 degrees and line a 12 hole muffin tin

* Sift flour, cinnamon and bicarb soda into a bowl, add the rolled oats and sugar and stir to combine

* Whisk eggs, yoghurt and oil together, add mashed banana and stir to combine

* Pour into bowl with dry ingredients and mix with a wooden spoon until just combined – mixture will still be lumpy

* Spoon into muffin tin and bake for approx 20 minutes or until lightly golden and cooked through.

* Leave to cool in cases for 5 minutes and then remove from tin.

** These can also be frozen.

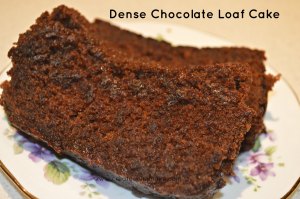
Dense Chocolate Loaf Cake

It feels like it has been awhile since I have made something truly decadent.  When searching for a recipe to rectify this, there is no better book to turn to than ‘How to be a domestic goddess’ by Nigella Lawson.  This is now the second recipe I have made from this book, where she suggests leaving the cake for a day or so for the flavours to develop (see lemon and almond cake), and while this is VERY frustrating for me – I like the instant gratification baking brings, it it truly worth waiting!  This cake is extremely moist, and although I used a mixture of milk and dark chocolate to make up the 100g required, it was still very rich.
I highly recommend putting the cake tin on another tray, as even though I used the cake tin suggested, it still leaked over the sides…. and yes, I will admit to eating the overflowed cake pieces!

Chocolatey Goodness x

Chocolatey Goodness x

225g soft unsalted butter

375g dark brown sugar

2 large eggs, beaten

1 tsp vanilla extract

100g dark chocolate – melted

200g plain flour

1 tsp bicarbonate of soda

250ml boiling water

* Preheat oven to 190 degrees and fully line a 23 x 13 x7cm loaf tin.

* Cream the butter and sugar, then gradually add the eggs and vanilla, beating together well

* Fold in the melted chocolate, being careful not to over beat

* Gradually add the flour, alternating with the boiling water which you need to add the bicarb soda to – the batter will be quite runny

* Pour into the lined tin – it’s also a good idea to place tin on a baking tray lined with foil/baking paper as there will be drips!

* Bake for 30 minutes, then turn down oven to 170 degrees and continue to bake for a further 15 minutes.  When you test the cake it will still be quite moist, so a skewer won’t come out completely clean

* Leave cake in the tin to completely cool before turning out.  It can even be left for a day or so as the flavour will improve.  Also don’t worry – the middle of the cake will sink, as it’s so moist, this just adds to it’s charm!

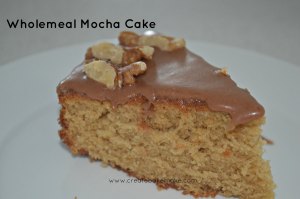
Throwback Thursday – Wholemeal Mocha Cake

I’m still enjoying making the old recipes from my Nan’s McAlpins cookbook.  The recipes are pretty basic, and they stick to tried and true flavours and techniques.  When I saw this recipe, I thought it was a winner before I had even tasted it!  It goes without saying that a coffee and a piece of cake go together – so why not combine the two?  The addition of chocolate icing literally tops off the flavour of the cake, and I love the walnuts too.  Before I started making the recipes from this book, I’d never used coffee essence before in my baking.  Whilst it did give this cake a good flavour, next time I think I will substitute the essence for an espresso shot…  or maybe two!

chocolate + coffee = winning combination

chocolate + coffee = winning combination


6oz Wholemeal self raising flour

pinch of salt

3oz butter

4oz caster sugar

2 eggs

4 tablespoons milk

1 dessert spoon coffee essence

walnuts to decorate

* Sift flour & salt

* Cream butter and sugar, beat in eggs gradually

* Mix in sifted ingredients alternatively with milk and coffee essence

* Pour into a greased and lined 20cm tin and bake in a moderate oven (180 degrees)  for 20 – 25 minutes.

* When cake has cooled, top with a simple chocolate icing and decorate with walnuts if you wish.