Baptism Cake – Butter Cake with Buttercream Frosting

Setting off on our 1700km road trip down to Victoria, we didn’t make any plans as to where we would stop, or how far we wanted to get each day.  The only deadline we had was that we needed to be in arrive by the Sunday morning (we left on Friday morning), as our boys were being baptised at the local church that morning.

Thankfully the boys were PERFECT (well, close enough anyway!) and we arrived a whole 24 hours before the baptism.  Although it was a small event, of course we needed a cake to celebrate!! In theory this gave me plenty of time to make and decorate one for them.

I decided to go with a simple butter cake, topped with butter cream – the same one I made for my sister’s baby shower.  I bought some very cute animal cake toppers from Coles, and also used smarties to decorate – I did need 2 large bags to get enough of the colours that I wanted!

Baptism Cake1

I only finished decorating the cake 10 minutes before we had to leave for Church as I had no little help from my husband who decided to go riding that morning and lost track of time – but let’s not even get me started on that!

Baptism Cake

The cake was a big success, there was way too much for just seven adults, but Liam was more than keen to try some!

This is such a versatile and easy cake to make.  Even though you need to make two cakes to get the four layers, it still takes no time at all to put together.  After the stress of getting everyone and the cake ready, it was a very fitting way to end what turned out to be a beautiful day xx

baptism 2

Carrot, Banana and Coconut Muffins

These muffins are jam packed full of yummy fruit, veggies and seeds and are also quite filling – the perfect snack to stop any over indulging at your next Christmas party!  This recipe is from ‘Wholefoods for Children’ by Jude Belreau. I am LOVING this book, it is full of great recipes not only for babies and kids, but the big kids too!  This recipe made around 24 muffins, so I stashed half of them in the freezer, and they have defrosted really well.

Please don’t be put off by the list of ingredients, these were really quick and easy to make (with a little helper), and you can always substitute regular flour for spelt flour and cow’s milk for coconut milk if you don’t have any. The original recipe also suggested sultanas, but I prefer currants.

Carrot Banana & Coconut Muffins

130g white spelt flour

165g wholemeal spelt flour

90g rapadura sugar

2 1/2 teaspoons baking powder

1/2 teaspoon ground cinnamon

45g desiccated coconut

1 teaspoon quinoa flakes

1/2 cup pecans or walnuts roughly chopped

1/4 cup sunflower seeds roughly ground

1/4 cup pepitas roughly ground

1 banana cut into small pieces

1/2 cup rasins

90g unsalted butter melted and cooled

1 egg

1/2 cup coconut milk

1/2 cup plain yoghurt

1 teaspoon vanilla extract

* Preheat oven to 180 degrees and line muffin tins with cupcake papers

* Place the flours, sugar, baking powered, cinnamon, coconut, quinoa flakes, nuts and seeds into a bowl and whisk together to combine.

* Add the carrot, banana and currants and mix through

* Place the butter, egg, coconut milk, yoghurt and vanilla in a bowl and mix until it has just combined

* Add to the dry ingredients and mix through until just combined. Let the mixture stand for a couple of minutes to absorb some of the liquid, then spoon into muffin pan.

* Bake for approx 20 – 25 minutes until golden on top and cooked through.

Christmas Baking – Shortbread

Is there anything better than shortbread at Christmas time?  This is the only time of the year I ever make this (all bar last year when I made interesting shaped shortbreads for my sister’s hens night), and i just LOVE the stuff.

This recipe is from my Mum, going waaaay back to when we were kids and she was stuck with us in a Doctor’s waiting room watching crappy morning tv shows (this was the early 90s – some things haven’t changed though), and she saw this on a cooking show called ‘What’s Cooking’. She was so impressed with it, that she wrote down the number at the end of the show, and called up to get the recipe posted to her – that is a hard copy typed out and sent through the post – yes kids, this really used to happen!  Since then it’s been her trusted recipe, which over the past few years since I’ve been making it I’ve called my own.

My biggest tip is that you need to make this in a cool room – living in Brisbane this can be hard during the Summer, so I always try to make it first thing in the morning.

Shortbread

250g softened butter

125g caster sugar

25g rice flour

5 drops of vanilla essence

375g plain flour

* Preheat oven to 190 degrees.

* Beat together the butter, sugar and rice flour until they turn white. Add a few drops of vanilla essence and continue to beat.

* Gradually add the flour to the mixture, whilst continuing to mix on a low speed until a paste forms.

* Turn mixture onto a cool bench dusted with flour and work until a smooth ball forms.

* I split my ball into two and place one in the fridge, covered in glad wrap.

* Roll the other ball until apron 1cm thick and use cookie cutter to make desired shapes.

* Bake in oven for approx 12 minutes until edges start to turn a golden brown.

White Chocolate, Macadamia and Coconut Cookies

Last year, Nestle bought out a book ‘Australia’s Sweet Baking Favourites’ as part of a promotion when you bought a few of their products.  Being the recipe book collection/addict that I am, naturally I got it.  There are some great traditional favourites in this book, but I was eager to add my own spin to a recipe. I settled on the White Choc Chip and Macadamia Cookie recipe since I had a few organic (read expensive) macadamias left over from a slice I’d made a few days before.  Naturally, it only seemed right to add coconut to this mixture to make these taste even better.

We LOVED these, and it just adds further proof (not that I needed any) that coconut makes everything taste better.  Enjoy!

white choc chip macadamia and coconut cookies

125g softened butter

3/4 cup brown sugar

1 egg

1 3/4 cup sifted self raising flour

1 cup white chocolate bits

3/4 cup coarsely chopped unroasted macadamias

1/4 cup shredded coconut

* Preheat oven to 170 degrees and line two baking trays with paper

* Beat together the butter and sugar until pale and creamy, then add the egg and beat until just combined.

* Stir through the flour, white chocolate bits, macadamias and coconut until combined

* Roll tablespoons of mixture into balls and place on trays – leave approx 3cm gap between cookies, and press down on them gently to lightly flatten

* Bake for approximately 15 minutes until golden. Leave to cool on trays for 5 minutes before transferring to a wire rack

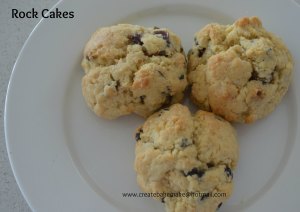
Throwback Thursday – Rock Cakes

Earlier this week, Liam had one of his little friends come over for a play.  I’d had the best intentions of tidying up the night before, but it just didn’t happen.  That morning I was madly racing around trying to make the house at least semi presentable, Liam on the other hand seemed to be following me around unpacking everything I had just put away.

I’d wanted to do some baking for the kids morning tea, but when it was apparent I was quickly running out of time, I thought about making some scones, but changed my mind at the last minute and made Rock Cakes.  This recipe is from my old McAlpins baking book, so I knew it was going to be easy to put together.  When adding the dried fruit I decided to go with currants and chopped dates which were super yummy.

These tasted great straight out of the oven.  If you wanted to, you could cut them in half and add butter or jam, but we were happy to eat them on their own.  The kids enjoyed them, as did Saxon (our dog), who always does well when the kids are outside eating!

Simple & Delicious

Simple & Delicious

2 cups self raising flour

90g unsalted butter, chilled & cubed

1/2 cup caster sugar

1/2 cup mixed dried fruit (I used currants and dates)

1/2 teaspoon ground ginger

1 egg

1/4 cup milk

* Preheat oven to 200 degrees and line 2 baking trays with greaseproof paper

* Sift the flour into a large bowl and rub in the butter with your fingertips until the mixture resembles breadcrumbs.

* Stir through the sugar, dried fruit and ginger.

* Whisk together the egg and milk in a bowl and add to the dry ingredients, mixing until a dough forms.

* Drop rough heaps of mixture (I used a soup spoon) onto the trays and bake for 10 – 12 minutes (I found mine were ready after 10 minutes).

* Transfer onto a wire rack to cool

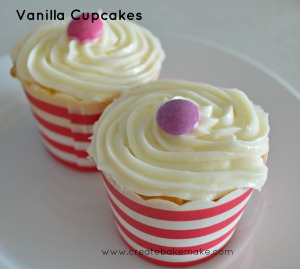
Vanilla Cupcakes

Sometimes I crave just a simple cupcake.  No indulgent added extras, just a plain simple vanilla cupcake with frosting.  If you feel the same, then these are for you.  To add to the simplicity, this is an easy recipe where all ingredients are added and mixed together.  These cupcakes are super light and fluffy, you can have them with just icing or turn them into butterfly cakes with jam and cream.

Simply perfection

Simply perfection

120 grams unsalted butter – softened

2/3 cup caster sugar

1 1/2 cups self raising flour

1/2 cup milk

2 teaspoons vanilla essence

2 eggs

* Preheat the oven to 180 degrees, and line a 12 hole cupcake tin with paper cases

* Put the butter, sugar, flour, milk, vanilla and eggs in a bowl and beat with electric beaters on a low speed for 2 minutes or until well mixed

* Increase speed and beat for a further 2 minutes or until smooth and pale

* Spoon mixture in to cupcake tray and bake for 20 minutes or until golden

* Allow to cool completely on a wire rack

* Ice/decorate as desired and enjoy!!

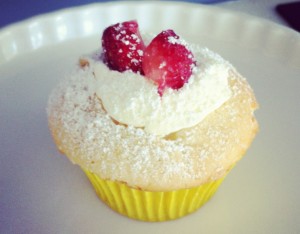
Butterfly cupcake with strawberry and cream - yum!

Butterfly cupcake with strawberry and cream – yum!

Polka Dot Cookies

Hello, my name is Lauren and I am addicted to food magazines.  I have a huge pile of magazines and recipes that I just can’t bear to part with. Slowly I have tried to cull the number I have hoarded away, as soon as I get rid of them, they are replaced by more.  I was tackling this never ending project earlier in the week, and came across this recipe that I had pulled out of a magazine (I have no idea which one it may have come from).  I used M&M’s which I think are better than smarties anyway.  The pack I had was just enough to decorate all of the cookies and leave a few leftover for me.  The original recipe is double what I have put below, the half serving made around 36 cookies which is more than enough for morning tea!

The last time I made these was before we were married, so at least five years ago – and they are just as good as I remembered!

These are GREAT!

These are GREAT!

2 cups of self raising flour – sifted

1/2 cup firmly packed brown sugar

1/4 cup malted milk powder

150g melted unsalted butter – slightly cooled

2 eggs lightly beaten

1/2 tablespoon vanilla extract

180g pack of smarties – or M&M’s

  • Preheat oven to 180 degrees (160 if fan forced) and line two trays with baking paper.
  • Combine flour, sugar and malted milk powder in a bowl and stir to combine.
  • Make a well in the centre and add eggs, vanilla extract and butter and mix together
  • Using a tablespoon of mixture, roll into balls, flatten slightly and place on tray approx 4cm apart. Press smarties/M&M’s into top of cookies
  • Bake for 8 – 9 minutes and swap trays halfway through
  • Stand on trays for 1 minute before transferring to wire rack to cool

Throwback Thursday – Chocolate Whirl Cake

Yikes…  it’s Wednesday afternoon and I’ve just realised I haven’t baked anything for Throwback Thursday!  Luckily the McAlpins recipes are all pretty simple,  combine that with a happy baby and a big boy at kindy and the crisis is averted!

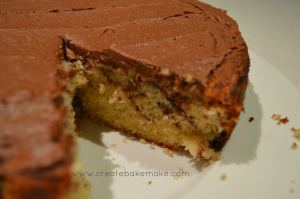
This reminds me of a much simpler version of the rainbow cakes we used to have as kids (this may be a project for the weekend).  The cake itself is quite plain, but the chocolate ‘whirl’ and butter icing provide the kick that it needs.

chocolate whirl cake copy 2

Click here for conversion table

8 oz (2 teacups) self raising flour

pinch of salt

4 oz margarine (I used unsalted butter)

6 oz castor sugar

1/2 teaspoon vanilla essence

3 eggs

4 tablespoons milk

1 tablespoon coca blended with 2 tablespoons of boiling water

  • Sift flour and salt
  • Cream margarine/butter and sugar and beat in eggs gradually
  • Mix in sifted ingredients alternately with milk and vanilla essence
  • Turn into a greased tin lined on bottom with paper (I used a 20cm round tin)
  • Pour the blended cocoa on the top and stir it around with a knife
  • Bake in a moderate oven for 50 – 60 minutes (I baked my cake for 35 minutes at 170 degrees in a fan forced oven
  • When cold, ice the top with Chocolate Butter Icing

Chocolate Butter Icing

3 oz icing sugar

1 oz butter

1 tablespoon cocoa

  • Sift sugar
  • Blend the cocoa into a thick paste with boiling water, mix in the icing sugar well
  • Soften the butter and work into the icing
  • Spread over cake or use for piping/decorating cakes

DSC_0869 copy 2

It’s a scone off!

I love scones.  They are the perfect morning/afternoon tea, and super easy to put together. For the last few years I’ve used a traditional recipe (source unknown) and apart from the couple of times when I used plain flour instead of self raising (I blame baby brain) they have never failed. In the past I’ve also tried Lemonade Scones (made using a can of lemonade and cream), but there is nothing like the traditional recipe in my opinion.

After devouring Nigella Lawson’s ‘How to be a Domestic Goddess’ – something I wish I was, but constantly fall short on – I was keen to try her recipe ‘Lily’s Scones’ which rather than using self raising flour, use plain flour combined with bicarb soda and cream of tartar.  What better way to compare the two than to have a scone off!

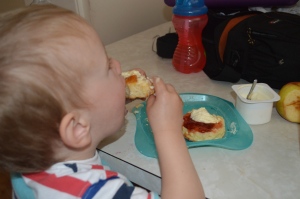
My little helper as well as my family have enjoyed this challenge.  We’ve had a few debates over which scone is better, I think they have been watching too many cooking shows with comments about the ‘crumb’, ‘texture’ and ‘overall appeal’ being tossed about.

Always eager to help out!

Always eager to taste test!

We found Nigella’s scones to be VERY light and fluffy – thanks to the cream of tartar, although they rose, I felt they could have been higher. The egg wash gave them a good colour and they tasted great.

Nigella's scones

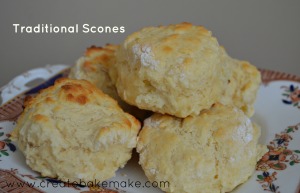
We didn’t find a huge difference in taste, it was really the different textures that set the two apart.  Personally I prefer the original recipe, they rise well and have a great texture and taste.

Original and still the best?

Original and still the best?

Both of the recipes are below – you be the judge!

‘Lily’s Scones’ – How to be a Domestic Goddess by Nigella Lawson

500g plain flour

1 teaspoon salt

2 teaspoon bicarbonate of soda

4 1/2 teaspoons cream of tartar

50g cold unsalted butter diced

25g trex, in teaspoon lumps (or use another 25g butter)

300ml milk

1 large egg beaten for egg wash

  • Preheat oven to 220 degrees
  • Sift the flour, bicarb and cream of tartar into a large bowl
  • Rub in the fats until it looks like breadcrumbs
  • Add the milk all at once and mix briefly with a knife
  • Turn onto a floured surface and knead lightly to form a dough
  • Roll out to about 3cm thickness
  • Dip cutter into some flour (6 1/2 cm round cutter) and cut out scones.
  • Bring excess dough back together to cut out more scones (I made 11)
  • Place on a lightly greased baking tray quite close together and brush with egg wash
  • Place in oven and cook for 10 minutes or until risen and golden

vs

Traditional Scone Recipe – origin unknown

3 cups self raising flour

pinch of sale

1/4 cup cold unsalted butter diced

2 1/4 cups milk

extra milk for wash

  • Preheat oven to 230 degrees
  • Sift flour and salt into large bowl
  • Add butter and rub in until mixture resembles breadcrumbs
  • Add approx 2 cups of milk and mix together with a butter knife.  Add additional milk as needed (I find I sometimes don’t need to full 2 1/4 cups of milk)
  • Turn onto a floured surface and knead lightly to form a dough
  • Roll out to around 3cm thickness (I don’t use a rolling pin, instead using my hands to pat out/shape)
  • Dip cutter into flour and cut out scones
  • Bring excess dough back together and cut out more scones (I usually make 10 -12 scones)
  • Place on lightly greased baking tray close together so they are almost touching and brush excess milk over for glaze
  • Place in oven and bake for 12 minutes or until risen and golden

Throwback Thursday – Wholemeal Cinnamon Cake

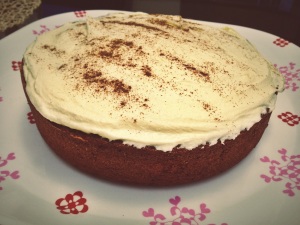
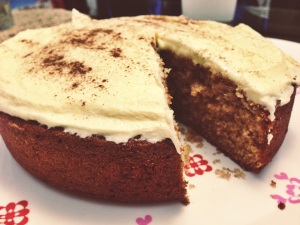
Vanilla and Cinnamon – a winning combination in my opinion.  Whilst this isn’t a traditional tea cake, the taste and texture certainly reminded me of one.  The buttercream frosting was super simple to make and complemented the cake perfectly.  I omitted the sherry from the buttercream & went with vanilla instead.  Another great recipe from the McAlpins book.

For metric conversion, please click here

Yum...

Yum…

8 oz (2 teacups) wholemeal self raising flour

Pinch of salt

1 dessertspoon cinnamon

4 oz butter or margarine

5 oz sugar

1 tablespoon golden syrup

3 eggs

1/4 pint (6 tablespoons) milk

1/2 teaspoon vanilla essence

* Sift wholemeal flour, salt and cinnamon

  • Cream butter, sugar and golden syrup, beat in eggs gradually
  • Mix in sifted ingredients alternately with milk and vanilla essence
  • Turn into a greased 7 1/2 inch tin lined on the bottom with paper.
  • Bake in a moderate oven 50-60 minutes (I baked mine at for 30 minutes in a 160 degree fan forced oven)
  • When cold cover the top with butter cream and sprinkle with cinnamon

Butter Cream

5oz icing sugar

2 oz butter

sherry or vanilla flavouring

  • Sift sugar
  • Soften butter slightly and beat to a cream, using a wooden spoon (I chose to use my kitchenaid mixer!)
  • Add sugar by degrees, then flavouring, working in well.
  • Use as a filling or for piping on cake

IMG_7355